DIY Peel & Stick Wallpaper Tips and Tricks
Disclaimer: This post may contain affiliate links. When you shop the links, I receive a small commission at no additional cost to you. As an Amazon Associate, I earn from qualifying purchases.
It’s actually super easy to apply peel and stick wallpaper as a complete beginner with NO previous wallpapering experience.
In the past year, I’ve completed TWO peel & stick wallpaper accent wall projects and thought I’d share all of the best tips, tricks, and things to know before starting out.
Peel & Stick wallpaper is SO much better than traditional wallpaper. It’s less of a commitment since you can remove it easily. Plus, it’s simple to apply.

Peel and stick wallpaper can be affordable, too! I’ve purchased both peel and stick wallpaper prints straight from Amazon for both projects. Of course, if you have more of a budget, you can splurge and buy pricier peel and stick options from more designer retailers.

Tips Before Starting:
- Make sure you have a second person for this project. Doing it alone would be really hard. For my first project (the dining room) I had my husband assist me. For my second project (the nursery) I had my sister help.
- Especially if this is your very first time attempting wallpaper, pick a pattern that doesn’t require lining up of the patterns from panel to panel. Both of the wallpapers I’m featuring below did not require this, they looked just fine without having to worry with that step.
- Don’t worry about small mistakes. When you are SO up close to the wallpaper applying it, you’ll easily see even the tiniest of mistakes or air bubbles. I had several of these that I couldn’t fix and it really bothered me at first, but once you take a step back and look at the wall as a whole you won’t even notice it.
- Watch a few youtube videos before starting. These were the two I watched and then felt confident enough to tackle the project – How to Hang Peel and Stick Wallpaper | Simple Tips to Do It Yourself and How to Install Peel & Stick Wallpaper to transform your room in minutes!.
Materials Needed:
First, purchase your peel and stick wallpaper and the wallpaper smoothing tool kit.
- Obviously, you need rolls of peel and stick wallpaper. Be sure and measure the dimensions of your walls and order slightly more than you think you need.
- Wallpaper Smoothing Tool Kit (image below) You NEED the blue smoother and knife.

Video Demo Using These Tools:
WATCH THIS BEFORE STARTING YOUR PEEL & STICK PROJECT! .. and make sure you have a smoothing tool and exacto knife. I found this super cheap kit to be the perfect thing.
Dining Room Wallpaper
The very first project I was really nervous I was going to mess things up but it turned out to be much easier than I thought. I opted for a half wall in our dining room.
I selected a very subtle print so that things wouldn’t be to “busy.” Watch my short video tutorial below for the dining room project. Then, I’ll include some more tips beneath it that you need to know before starting on this project.
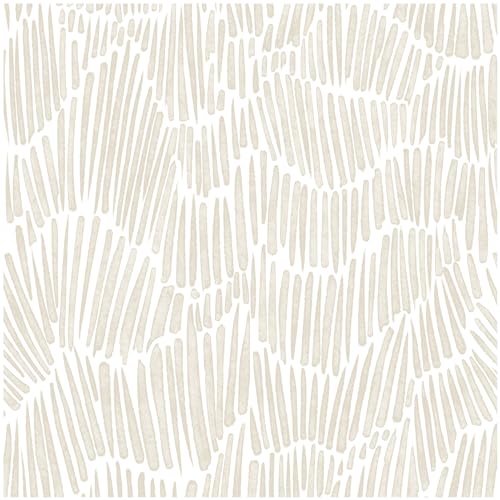
Theper Beige Wallpaper
This is the peel and stick wallpaper you see in my dining room!
The best part about this print is that you don’t have to “print match” each roll. I didn’t line anything up and think it still looks perfectly fine.
Everyone always comments on how nice it looks and it blends in well with the surrounding wall and ceiling colors. Here is how it looks!

Nursery Wallpaper
Since the dining room wall papering job went well, I decided to attempt an ENTIRE wall in the nursery. This is the print I selected for that!


Video Demo of Applying Nursery Wallpaper
This video shows the process of me applying a strip of this wallpaper to the wall and how to use the knife to cut around trim and ceilings.
NuWallpaper Sage Songbird Peel & Stick Wallpaper
This is the peel and stick wallpaper you see in the nursery!!
You don’t have to “print match” each roll. I didn’t line anything up and think it still looks perfectly fine.

This nursery wall didn’t have any doors on it which was a huge win but I did have to work around an outlet which wasn’t a big deal at all. For the outlets, remove the covers and when you get to the outlet, apply wallpaper as usual over top of it.
Use the exacto knife or scissors to cut an opening around the actual outlets. Once you put the cover back on top, you won’t see the sloppy cut out!

It’s such a pretty print for a baby girl but I think it’ll also work for a baby boy since it’s mostly greenery and has some blue birds mixed into the pink florals.


Videos I Watched Before Starting:
Before you start your peel and stick project, here are some youtube videos I personally watched to teach myself some tricks! I would definitely watch these before starting on your peel and stick project.
- How to Hang Peel and Stick Wallpaper | Simple Tips to Do It Yourself
- How to Install Peel & Stick Wallpaper to transform your room in minutes!
Conclusion
I’m really proud of these two DIY projects I tackled and hope this gave you the inspiration you needed to attempt a peel and stick wallpaper wall yourself!


